
❄️ Why a Raspberry Pi? A Beginner’s Journey Into Endless Possibilities
For years I tinkered with computers, hardware, and random tech projects — but somehow I never touched a Raspberry Pi. It just wasn’t on my radar. Then one day I picked one up for fun, thinking I’d try a simple project just for giggles.
Honestly? I wasn’t impressed at first. I almost gave up on it.
But then I started reading about home security, automation, and small-scale servers. That led me to building a home server, which led me to building a retro gaming system. I thought I was doing pretty well… until I dug deeper into what other people were building.
That’s when it hit me: I had only scratched the surface.
There are thousands of people doing incredible things with Raspberry Pi boards — robotics, automation, AI, smart homes, media centers, weather stations, classroom tools, and more. It made me realize something:
Every school should have Raspberry Pi classes. Kids, adults, seniors — it doesn’t matter. You’re never too young or too old to start learning.
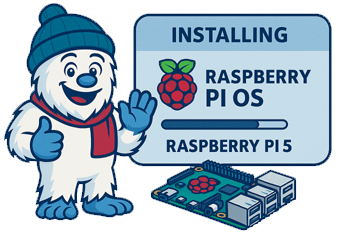
And it all begins with installing Raspberry Pi OS.
🧊 How to Install Raspberry Pi OS: A Complete Step‑by‑Step Guide
Raspberry Pi OS is the official operating system for all Raspberry Pi boards. It’s lightweight, stable, and designed to squeeze maximum performance out of the tiny computer. Whether you’re building a retro gaming console, a home server, or a robotics project, everything starts with installing the OS.
This guide walks you through the entire process — from preparing your SD card to completing the first boot.
🧰 What You Need Before You Start
- A Raspberry Pi any model works — Pi 5 with 8 GB RAM (commission earned)
- A microSD card
- 32 GB recommended for Raspberry Pi OS with desktop
- 16 GB minimum for Raspberry Pi OS Lite
- A microSD card reader
- A computer with internet access
- Power supply appropriate for your Pi model
Optional but helpful:
- HDMI cable + monitor
- Keyboard and mouse
- Ethernet cable
🧊 Step 1: Download Raspberry Pi Imager
The easiest and official way to install Raspberry Pi OS is with Raspberry Pi Imager, provided by the Raspberry Pi Foundation.
- Go to the official Raspberry Pi website
- Download Raspberry Pi Imager for Windows, macOS, or Linux
- Install and launch the program
Raspberry Pi Imager includes all versions of Raspberry Pi OS — no extra downloads needed.
🧊 Step 2: Prepare and Flash the microSD Card
- Insert your microSD card into your computer
- Open Raspberry Pi Imager
- Click Choose Device → select your Raspberry Pi model
- Click Choose OS → select Raspberry Pi OS (32‑bit or 64‑bit)
- Click Choose Storage → select your microSD card
Optional but recommended: Advanced Settings
Click the gear icon to preconfigure:
- Wi‑Fi credentials
- SSH access
- Hostname
- Default user and password
This is especially useful for headless setups (no monitor).
Then:
- Click Write
- Wait for flashing + verification
- Safely eject the microSD card
🧊 Step 3: Set Up the Raspberry Pi Hardware
- Insert the microSD card into the Pi
- Connect:
- HDMI cable to your monitor
- Keyboard and mouse
- Ethernet cable (optional)
- Plug in the power supply — the Pi boots automatically
HDMI Port Notes
- Pi 4 & Pi 5: micro‑HDMI
- Pi Zero series: mini‑HDMI
🧊 Step 4: Complete the First‑Boot Setup
Once Raspberry Pi OS boots, you’ll be guided through:
- Language and region selection
- Wi‑Fi setup (if not preconfigured)
- Software updates
- Screen configuration (overscan, resolution)
This only takes a few minutes.
🧊 Step 5: Start Using Raspberry Pi OS
After setup, you’ll land on the Raspberry Pi desktop (or terminal if using Lite). From here you can:
- Install software via Add/Remove Software
- Update the system
- Begin your project — coding, servers, media centers, robotics, anything
🧊 Tips for a Smooth Experience
Use a quality SD card
Faster cards = faster boot and better performance.
Keep your Pi cool
Especially Pi 4 and Pi 5 — a heatsink or fan helps.
Back up your SD card
You can clone it using Raspberry Pi Imager or tools like Win32DiskImager.
🧊 Final Thoughts
Installing Raspberry Pi OS is straightforward thanks to Raspberry Pi Imager. Once you’ve done it once, you’ll realize how easy it is — and how many doors it opens. A Raspberry Pi isn’t just a tiny computer; it’s a gateway to learning, building, experimenting, and discovering what you’re capable of.